The Fourth of July is just around the corner and that means you’re probably starting to plan your menu! In addition to all the savory goodies you’ll be serving up, you’ll want an array of sweets and treats. And boy have we got the best easy way to wow your guests! This marbled sugar cookie hack is as simple as can be, even if you have no experience as a baker! The marbling elevates these cookies in the best possible way without having to shell out some serious money at your local bakery. So let’s get started!

Looking for app ideas instead? Check out our 4th of July Appetizers with sixty drool-worthy ideas to get you going on your big soirée!

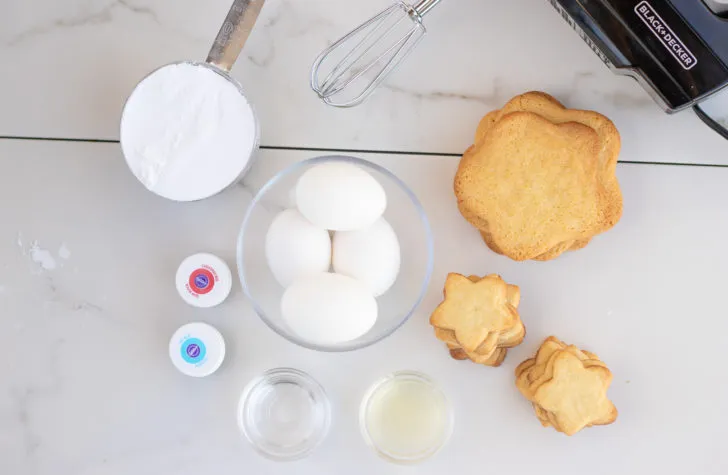
Start by making your cookie dough, using a fun cookie cutter (like the stars we used!), baking your cookies and letting them cool completely. You can opt for a storebought sugar cookie mix or make your dough from scratch (which definitely makes it more work, but also makes it tastier!). We opted to use a storebought mix to save time.

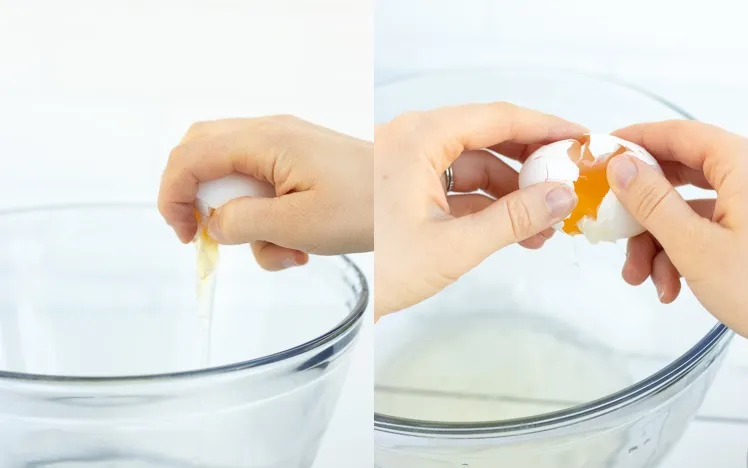
Then it’s time to make the royal icing! You may never have made it before, but don’t be deterred – it’s not difficult! Crack your room-temperature eggs and separate the yolks from the whites, discarding the yolks (or using them for something else). Make sure you don’t get any of the yolks in the mixture.

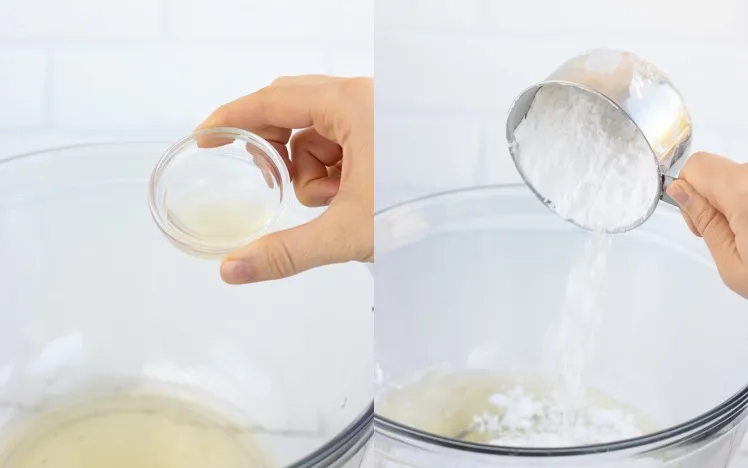
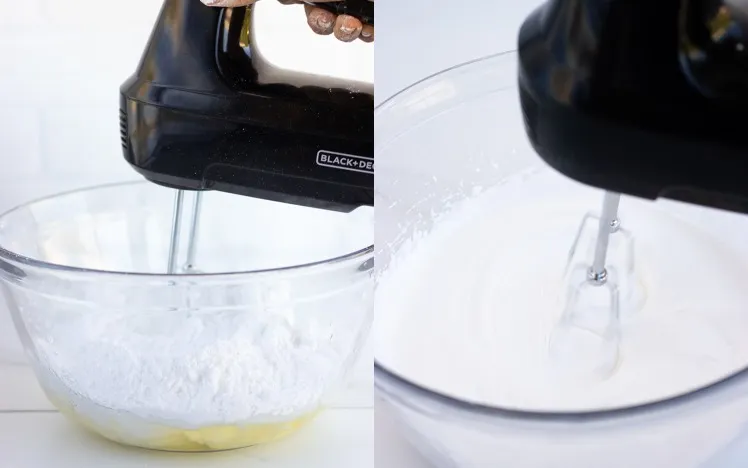
Add the lemon juice and icing sugar to the large bowl with the egg whites. Using electric beaters, beat on high for 7 to 10 minutes until soft peaks form. Alternatively, if you have one, use a stand mixer with the paddle attachment to cut down that time to 5-7 minutes. You’ll know soft peaks have formed when you pull the (turned off) beaters from the mixture and the icing slowly “melts” back into bowl. Scrape down the sides of the bowl at this point and mix for another 15 seconds or so to remove any lumps.

Once soft peaks have formed, you’re ready for the next step. The mixture will definitely be too thick at this point – don’t worry! Add water or more lemon juice (if you like a citrus taste) one teaspoon at a time and beat until it’s thin enough to run off the beaters in a steady stream. Our mixture required roughly 4 teaspoons to get to the consistency we need. Scrape down the sides again.

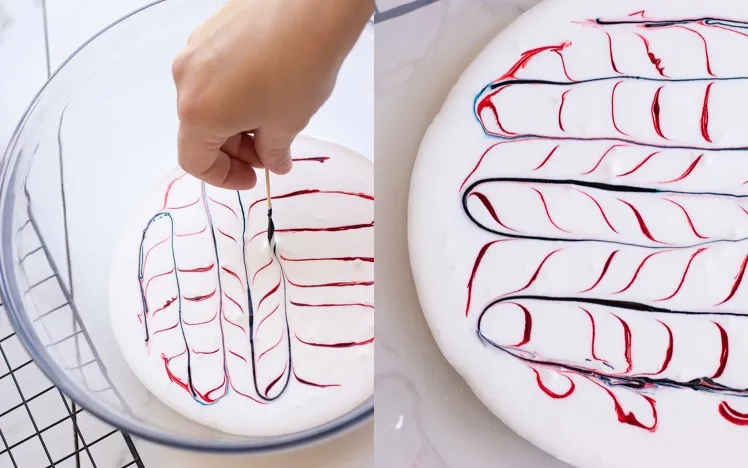
Now it’s time to add in some color! Using red and blue gel food coloring, zig-zag the red dye back and forth vertically and then zig-zag the blue dye back and forth horizontally over top. We used Witon dye and a toothpick (we’re in Canada!), but if you have access to it, we suggest using Americolor Soft Gel Paste, as it has no taste, won’t separate, and most importantly, won’t affect the consistency of the royal icing. It also comes in a squeezable tube making it easier to get those perfect lines without having to use a toothpick.

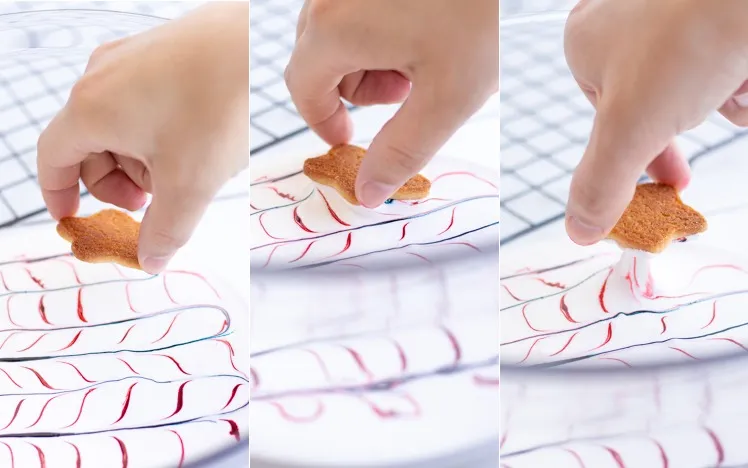
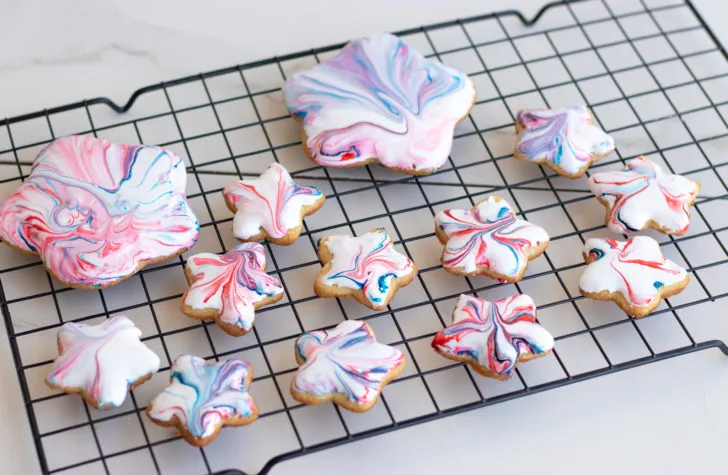
Dip each cookie into the icing slowly, carefully twirl the cookie while still in the icing (this is what creates the marbling effect), and pull straight up out of the icing. Hold the cookie a couple of inches up, allowing the excess icing to drip off before giving the cookie a quick twirl and flipping right side up. If there are air bubbles or the icing didn’t fully coat part of the cookie, tap it against your hand or gently drop on the tabletop to release air. If necessary move a toothpick in very small circular movements to move the icing around and release any remaining air. Repeat for all of the cookies, using a different section of icing every time. If needed, repeat the red and blue zig-zags on top.

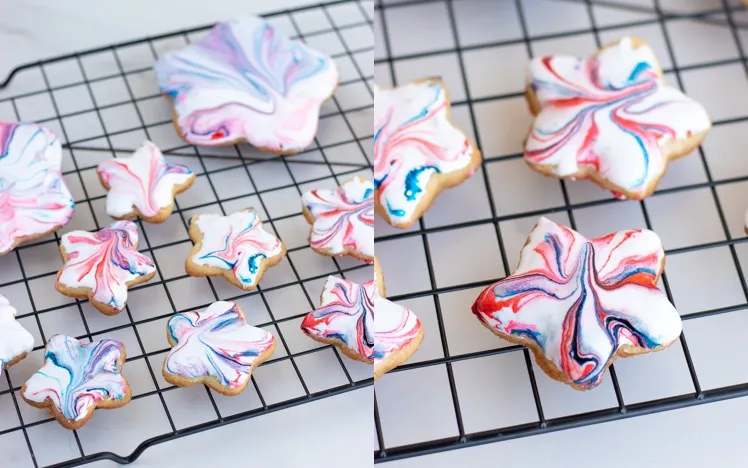
Place cookies on a wire cooling rack to dry overnight. Royal icing takes up to 24 hours to fully dry, but the cookies can be transferred to a container, unstacked need be. Don’t worry about the cookie itself drying out – sugar cookies last a long time before going stale (think weeks!). If you stack them too soon (or plastic wrap them, for example), the icing will be ruined, so leave them be! After an hour or so, they’ll start to look dry, but it’s only a thin outer layer that has dried at that point.

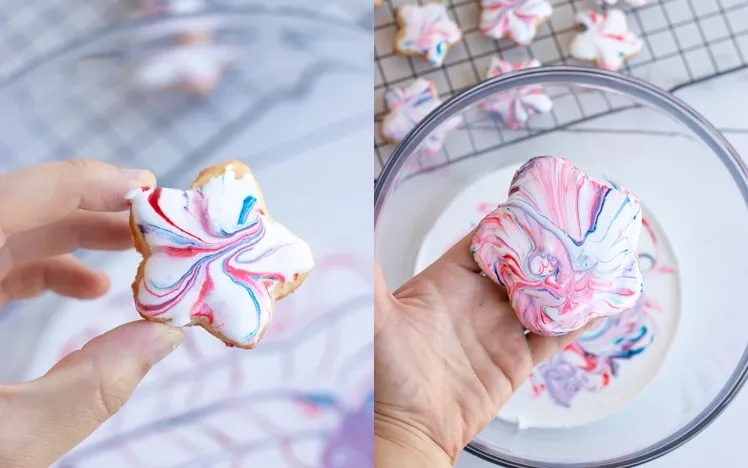
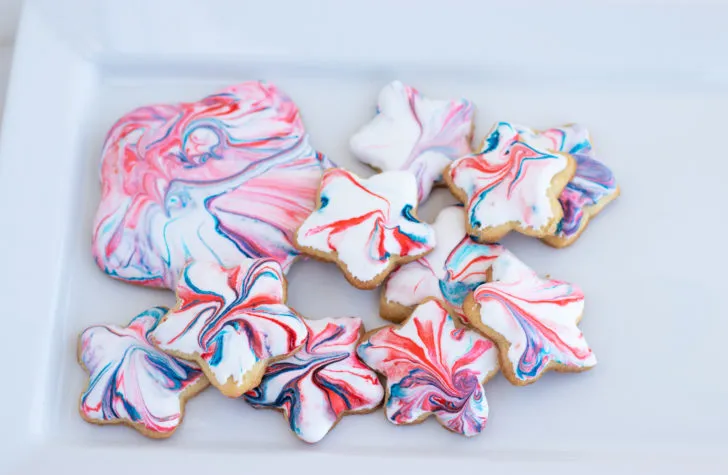
Every time you dip, the design will look different. Don’t fight it – it’s part of the beauty of these marbled cookies! So what are you waiting for? Time to get going on these beautiful marbled sugar cookies!

Servings: 12-24

Ingredients

  • Sugar cookie dough
  • Red food coloring gel
  • Blue food coloring gel
  • 4 egg whites, room temperature
  • 2 tsp lemon juice
  • 4 cups sifted icing sugar
  • Water, to thin

Equipment

  • Oven
  • Sheet Pan
  • Parchment Paper
  • Star cookie cutter, if desired
  • Electric Beaters or Stand Mixer
  • Toothpicks

Method

  • Roll cookie dough out until it’s about ¼ inch thick. Use a cookie cutter of your choice (we used a star to keep with the patriotic feel) to cut the dough and transfer to a parchment paper lined sheet pan. Bake the sugar cookies according to package instructions. Remove from oven and allow to cool completely on a wire cooling rack.
  • Add the egg whites, lemon juice, and icing sugar to a bowl or the bowl of a stand mixer (which we suggest if you have one). Beat on medium-high until soft peaks begin to form, roughly 7-10 minutes with a stand mixer or slightly longer with a hand mixer, stopping to scrape down the sides if needed.
  • Once soft peaks form remove the beaters/paddle and scrape down the sides. The mixture will likely be too thick at this point, so add water 1 tsp at a time until it’s thinned to the consistency of liquid honey. It should be thin enough that it drips off the spatula in a constant stream.
  • Remove the spatula from the bowl and carefully tap the bowl down on your counter a few times to drive any air bubbles out of the icing.
  • Using the red gel, zip zag the coloring horizontally back and forth across the surface, being sure to leave gaps between the lines where the white icing peaks through. Do the same with the blue gel, adding it vertically on top of red.
  • Dip the cookies one at a time, pressing them into the icing enough to coat the top and pulling them straight up out of the icing. Let them hover over the icing until the excess has dripped off, then with a slight swirl of your wrist flip them right-side up. Place back on the cooling rack to dry.
  • If there are air bubbles in the icing, carefully dip the tip of a toothpick into the bubble and use very small circular movements to force it out. Carefully tap the entire cookie on a hard surface (like your counter).
  • Once you’ve used every undipped area of the icing, redo the pattern of blue and red gel coloring on top again. It will only add to the beautiful marbling effect!
  • Royal icing takes up to 24 hours to fully dry, but the cookies can be transferred to a container, unstacked need be. Don’t worry too much about the cookie itself drying out - sugar cookies last a long time before going stale (think weeks!). If you stack them too soon (or plastic wrap them, for example), the icing will be ruined, so leave them be!

Notes

If you don’t have a star cookie cutter, no problem! These cookies will look just as beautiful if they’re simple circles.

Rhiannon Ball

Rhiannon loves to cook and bake but has also never said "no" to a takeout burrito (see, she's just like you!). Despite slowly running out of room in her cabinets, she continues to expand her collections of cookbooks and kitchen gadgets and is deeply jealous of people who can just "whip something up" without a recipe. When she's not in the kitchen, you can find her camping and hiking with her husband and rescue dog, Waffles.

We fully recognize that pasta should probably never be dyed blue, with one exception - patriotism food!
4th of July is less than a few weeks away and we’re continuing our Forkly countdown to the big day with 9 delicious and easy...
Get red, white & blown away with these 4th of July mini cheesecakes!
Fourth of July is one of the biggest holidays in America. Every year, friends and families gather together to celebrate American...
4th of July is one of America’s favorite holidays for many reasons: Great weather, great food and great company are generally...
Your 4th of July celebrations may look a little different this year but that doesn't mean you still can't enjoy delicious food and...
Last year a little book called “The Life-Changing Magic of Tidying Up” made us realize just how much stuff we’ve been...
Independence Day is just around the corner! Even if your celebrations look a little different this year, there are still so many...
Fourth of July is just a few weeks away and many people have already started their party planning for this festive holiday.
July 4th has been a day of patriotism for American's ever since the Declaration of Independence was adopted back in 1776.
In America, July 4th is a popular day for parties and celebrations to show their patriotism to their country.
Party planning doesn't have to be stressful and you shouldn't go bankrupt over it either.
Advertisement